
💪 How to Test Your Pole Grip Strength Without a Dynamometer
You don’t need fancy equipment to know if your grip is getting stronger.
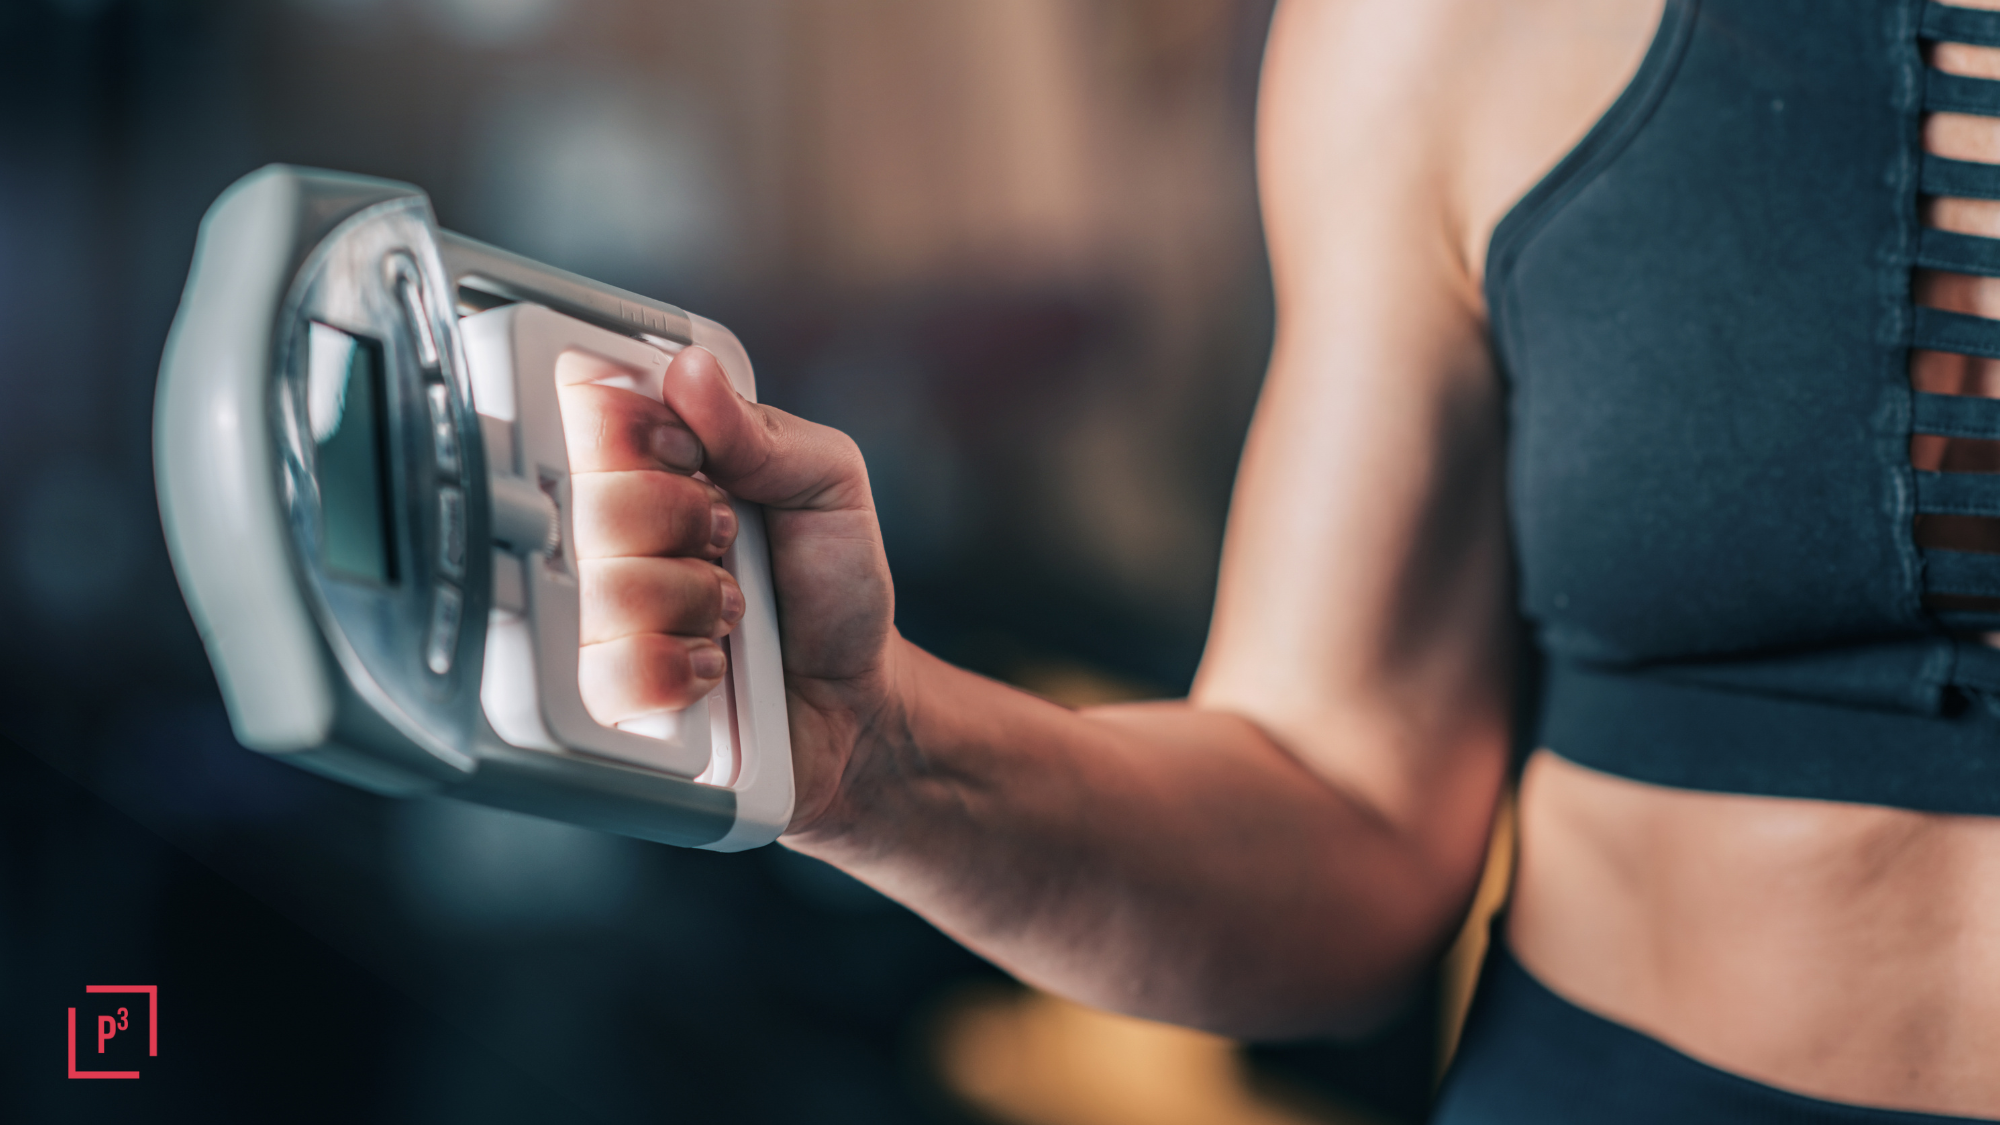
Most strength tests use something called a dynamometer – a handheld device that measures how hard you can squeeze.
You’ve probably seen one in a physical therapy or sports performance setting. It gives a number (in kilograms or pounds) showing your maximal grip force.
But here’s the thing: you don’t need one to test your grip.
Pole dancers can test grip strength using simple tools you already have at home – and get just as useful data for tracking progress over time.
Let’s break down what grip strength really means, how to measure it without a dynamometer, and how to keep your wrists and hands healthy while you’re at it.
Why Grip Strength Matters for Pole Dancers
Grip strength isn’t just about holding on – it’s about control, confidence, and longevity on the pole.
A stronger grip means:
✨ Fewer slips and wasted attempts on tricks you’re already strong enough for.
✨ More endurance during climbs, spins, and holds.
✨ Better shoulder and core engagement throughout transitions.
✨ Less wrist, elbow, and forearm pain over time.
Testing your grip regularly helps you see whether your training is working – and more importantly, where your weak links are.
The 5 Types of Grip Strength (and How They Show Up on the Pole)
Pole dancers don’t just grab the pole — we twist, hang, press, and balance from every angle imaginable. Each of those positions uses a different type of grip strength.
Here’s how each one works and where it shows up in your training 👇
💥 1. Crush Grip
What it is: Fingers and thumb wrap fully around an object (like a dumbbell or the pole).
Pole examples: The most used grip - common in climbs, spins, and base hand positions.
Body mechanics: Wrist is neutral or slightly deviated; shoulder flexed or abducted; elbow mostly extended.
Why it matters: If your fingers can’t flex strongly here, endurance drops fast – and your forearms fatigue early.
🧲 2. Open Crush Grip
What it is: The hand wraps but stays mostly open – seen often when using a 50 mm pole with smaller hands.
Pole examples: Ayeshas, handsprings, split grip, and other open palm grips.
Body mechanics: Requires strong wrist extension and finger strength at long muscle lengths.
Why it matters: Slippage here isn’t always about weak fingers – it’s often about poor wrist and shoulder positioning.
✋ 3. Support Grip
What it is: All fingers gripping on the same side, like in cup grip.
Pole examples: Static holds, inverts, and endurance-heavy transitions.
Body mechanics: Depends on elbow angle; shoulder neutral to flexed; wrist neutral or slightly deviated.
Why it matters: This is your endurance grip – if shoulder or elbow mechanics are off, your time under tension will collapse.
🤌 4. Pinch Grip
What it is: Thumb opposes the fingers with minimal palm contact.
Pole examples: Less common in pole - smaller grip points and transitions requiring fine control.
Body mechanics: Wrist neutral; relies on thumb mobility and balanced finger flexor/extensor strength.
Why it matters: Pinch grip is undertrained in pole, but crucial for endurance, transitions, and stability when your palm can’t fully wrap the pole.
🖐️ 5. Hand (Finger) Extension
What it is: Actively opening the hand against resistance.
Pole examples: Handstands – Not often used on the pole, but it keeps your hands healthy for the pole.
Body mechanics: Uses wrist and finger extensors to balance overused flexors.
Why it matters: Reduces overuse injuries, improves joint control, and keeps your grip balanced long-term.
How to Test Grip Strength With Household Items (No Dynamometer Needed)
You can test each type of grip with simple, at-home items. These DIY tests aren’t lab-perfect, but they’re consistent – and that’s what matters for tracking your progress month to month.
🧴 1. The Analog Scale Squeeze
What you need: A spring-based kitchen or bathroom scale.
How to do it:
Place the scale between your hands.
Squeeze as hard as you can for 3–5 seconds.
Record the highest number it reaches.
Repeat 2–3 times per hand and take your best score.
👉 Why it works: Gives you a measurable “squeeze value” – great for tracking crush grip strength gains over time.
🧗 2. Dead Hang Test
What you need: A pull-up bar, sturdy pole, or doorframe bar.
How to do it:
Hang with both hands using a neutral or overhand grip.
Keep shoulders active (no “dead” hang).
Time how long you can hold before your grip gives out.
Rest and repeat once or twice.
👉 Why it works: Measures support grip endurance.
A 10–20% increase in hang time = major gains in pole endurance.
🪣 3. Milk Jug or Bucket Carry
What you need: A filled jug, suitcase, or bucket with a handle.
How to do it:
Grip and lift slightly off the ground.
Hold for time or walk a short distance.
Repeat for both hands.
👉 Why it works: Tests real-world support and crush grip while exposing asymmetries.
If one hand quits early – that’s probably the same side that struggles to hold on.
📚 4. Pinch Test
What you need: Two books, cutting boards, or weight plates.
How to do it:
Pinch them between your thumb and fingers.
Hold for time or reps.
Increase duration or weight over time.
👉 Why it works: Builds and tests pinch grip control – key for transitions, fingertip holds, and pole precision.
🖐️ 5. Finger Extension Test
What you need: A hair tie, rubber band, or mini resistance band.
How to do it:
Loop it around your fingers.
Open your hand outward as far as possible.
Count reps or hold for time.
👉 Why it works: Strengthens the often-neglected extensors that protect your wrists and balance out your grip.
The Unsung Hero: Wrist Mobility
Your grip is only as strong as your wrists are mobile and stable.
When your wrists are stiff, you lose force transfer — and your chances of pain or inflammation skyrocket.
Limited wrist mobility makes it harder to find stable hand angles in Ayeshas, splits, and extended grips.
Your Wrist Moves in 4 Directions
Flexion: bending forward (palm toward forearm)
Extension: bending back (fingers point up)
Radial deviation: tilting toward your thumb
Ulnar deviation: tilting toward your pinky
Each of these ranges matters for both stability and performance.
✅ Performance: Better mobility = stronger, safer grip angles.
✅ Injury prevention: Balanced movement prevents overuse issues like tendinopathy or carpal strain.
✅ Recovery: Healthy wrists bounce back faster and tolerate heavier loads.
Try This Mini Wrist Recovery Routine
Wrist circles × 10 each direction
Palm stretch (on all fours, fingers back, lean gently)
Side tilts (radial ↔ ulnar)
Band extensions (open fingers against a rubber band)
Just 3-5 minutes a day can drastically reduce wrist pain and stiffness over time. (1)
Bringing It All Together
When you combine grip testing and wrist mobility work, you get the full picture of your hand and forearm performance.
You’ll start to notice patterns:
✨ You hold climbs longer after adding support grip drills.
✨ Spins feel smoother when your wrists move freely.
✨ Forearm soreness fades as your fingers learn to relax between reps.
Grip testing isn’t about bragging rights – it’s about understanding your body so you can train smarter, recover faster, and feel stronger every time you hit the pole.
Ready to See How You Stack Up?
If you want to test all five types of grip at home – crush, open crush, support, pinch, and extension —
I made something just for you.
👉 Download the Free Grip Strength Scorecard
This fillable PDF empowers you to:
✅ Test your grip with simple, at-home methods (no special tools).
✅ Access demo videos so you know exactly what to do.
✅ Track progress across all five grip types.
✅ Compare results week to week.
All you need is two dumbbells, a towel, and a hair tie (or rubber band) — that’s it.
No dynamometer, no guessing.
Just measurable progress you can see and feel on the pole.
Download your free Grip Strength Scorecard here and start testing your grip today.